Keeping your home’s exterior in good shape is key. Proper maintenance of your home’s exterior, including insulated siding, can stop expensive problems. It also helps save energy.
Worn-out siding can cause water leaks, pest problems, and higher energy bills. Expert advice can guide you through common siding repair issues. This keeps your home safe and energy-efficient.
Key Takeaways
- Understand the importance of maintaining your home’s exterior
- Learn how to identify common issues with insulated siding
- Get expert tips on how to tackle siding repair
- Improve your home’s energy efficiency
- Prevent costly damages with proper maintenance
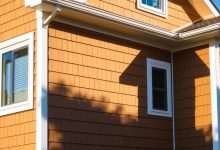
Understanding Insulated Siding: What Makes It Different
Insulated siding is special because it combines style, energy savings, and protection. It has a foam backing that adds extra insulation to your home. This is different from regular siding.
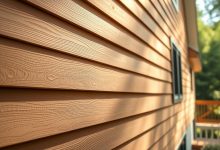
The Structure and Components of Insulated Siding
Insulated siding has three parts: the cladding, foam insulation, and a backing. The cladding can be vinyl, fiber cement, or engineered wood. This lets you choose a style that fits your home’s look.
The foam insulation, made from expanded polystyrene (EPS) or extruded polystyrene (XPS), goes behind the cladding. It creates a solid insulation layer. This helps keep your home warm in winter and cool in summer.
Benefits of Insulated Siding for Your Home
Insulated siding makes your home more energy-efficient. It keeps your home warm in winter and cool in summer. This can lower your energy bills and make your home more comfortable.
Experts say, “Insulated siding not only improves your home’s energy efficiency but also makes it look better and increase its value.” It’s a smart choice for anyone wanting to improve their home’s exterior.
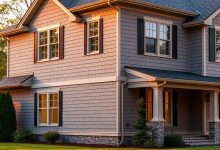
Popular Insulated Siding Materials and Brands
Popular materials for insulated siding include vinyl, fiber cement, and engineered wood. CertainTeed and James Hardie are well-known for their quality insulated siding products.
- Vinyl insulated siding is affordable and easy to maintain.
- Fiber cement insulated siding is durable and resistant to pests and fire.
- Engineered wood insulated siding gives a natural look and feel while insulating.
Common Insulated Siding Problems and Their Causes
Insulated siding can face damage, and knowing why it happens is key to fixing it. Several things can cause damage, affecting how well it works and looks.
Weather-Related Damage
Weather can really hurt insulated siding. Cold, rain, and sun can make it crack, fade, or loosen. Some materials get brittle in cold, making them crack easily.
Impact Damage and Physical Wear
Things like branches, hail, or other objects can damage siding. Also, everyday wear like scratches or dents can weaken it. Catching these problems early is important.
Installation Errors That Lead to Problems
Wrong installation is a big problem for insulated siding. Mistakes like bad sealing, wrong panel placement, or wrong fasteners can let moisture in. This can make insulation less effective and cause other issues.
Insulation Layer Deterioration Signs
The insulation inside the siding can get worse over time. Moisture, pests, or other things can cause it. Signs include less energy efficiency, higher bills, and visible siding damage.
| Cause of Damage | Common Signs | Potential Consequences |
|---|---|---|
| Weather-Related Damage | Cracks, fading, loose panels | Moisture infiltration, reduced insulation effectiveness |
| Impact Damage | Dents, scratches, broken panels | Compromised siding integrity, possible further damage |
| Installation Errors | Improper sealing, misaligned panels | Moisture issues, less energy efficiency |
| Insulation Layer Deterioration | Less energy efficiency, higher bills | More damage to siding, health risks |
Essential Tools and Materials for Insulated Siding Repair
To fix insulated siding, you need the right tools and materials. Being prepared makes the repair easier and faster.
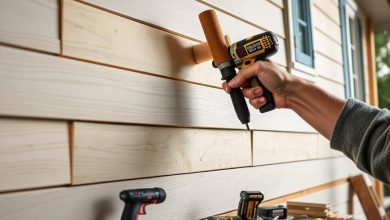
Must-Have Tools for DIY Repairs
Choosing the right tools is key for a good DIY insulated siding fix. You’ll need a utility knife, pry bar, hammer, and tape measure. These help you remove old siding, measure new pieces, and cut them right.
Recommended Materials and Replacement Parts
For recommended materials and replacement parts, think about your siding type. You might have vinyl, fiber cement, or metal. Make sure you have the right parts, like siding panels, insulation, and weatherstripping.
Safety Equipment You Shouldn’t Skip
Safety equipment is essential to keep you safe while fixing. You’ll need gloves, safety glasses, and a dust mask. They protect you from sharp edges, debris, and dust.
With the right tools and materials, you can do a safe and effective DIY insulated siding repair.
Assessing Damage: How to Inspect Your Insulated Siding
Knowing how to check your insulated siding is important. It keeps it working well and lasts longer. By inspecting it right, you can spot problems early. This can save you from expensive fixes later.
Creating a Systematic Inspection Plan
Begin by breaking your home’s outside into parts. You might use walls or floors as sections. Then, check each part for damage or wear.
Signs of Damage That Require Immediate Attention
Watch for cracks, dents, or gaps in the siding. These can cause bigger issues if not fixed fast. Also, look for water damage or exposed insulation.
Using Thermal Imaging to Detect Insulation Problems
Thermal imaging is great for finding insulation problems you can’t see. It shows where heat is escaping. This means there might be gaps or damage in the insulation.
When to Call a Professional vs. DIY
Some fixes you can do yourself, but others need a pro. Think about how bad the damage is and what you can do. Then, decide if you should fix it yourself or call a professional.
Insulated Siding Repair Tips: Expert Advice for Common Issues
Fixing insulated siding can seem hard, but it’s doable with the right advice. This siding keeps your home energy-efficient and protected. Yet, it can wear out over time.
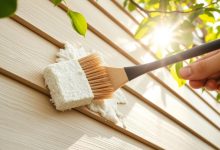
Fixing Small Cracks and Holes
Ignoring small cracks and holes can cause big problems. First, clean the area with a soft brush or cloth. Then, use a sealant that matches your siding to fill the damage. For big holes, you might need a patch or replace the section.
Addressing Loose or Detached Panels
Loose panels look bad and can harm your home’s insulation. Check the fasteners to see if they’re loose or damaged. Tightening or replacing them can fix the issue. If the panel is damaged, it’s best to replace it.
Repairing Weather Stripping and Seals
Weather stripping and seals keep your siding tight. Check these areas often for wear or damage. Replace old weather stripping with new, matching material. For damaged seals, use a sealant to seal them again.
Restoring Damaged Insulation Backing
The insulation backing is key for your siding’s effectiveness. If it’s damaged, you might need to fix or replace it. Minor damage can be repaired with special materials. But, big damage might need a pro to keep the insulation working right.
By following these siding repair tips, you can keep your siding in top shape. Regular checks and quick fixes stop small problems from getting worse.
| Repair Task | DIY Feasibility | Recommended Tools/Materials |
|---|---|---|
| Fixing small cracks and holes | High | Sealant, patching compound |
| Addressing loose or detached panels | Medium | Nails/screws, replacement panels |
| Repairing weather stripping and seals | High | Weather stripping, sealant |
| Restoring damaged insulation backing | Low | Specialized repair materials |
“Regular maintenance and timely repairs are essential to maintaining the integrity and performance of insulated siding. By addressing issues promptly, homeowners can prevent minor problems from escalating into costly repairs.”
Step-by-Step Guide to Replacing Damaged Insulated Siding Panels
Replacing damaged insulated siding panels is a DIY task that homeowners can do. It involves several steps to ensure success.
Removing the Damaged Panel Safely
To begin, carefully remove the damaged panel. Start by disconnecting any visible fasteners like nails or screws. Use a pry bar gently to avoid damage.
Wear protective gear, including gloves and safety glasses, to prevent injury.
Preparing the Area for Replacement
After removing the damaged panel, check for water damage or rot. Clean the area thoroughly for a good surface. Replace damaged insulation to keep insulation continuity.
Installing the New Panel Correctly
To install the new panel, align it with the others. Secure it using the right fasteners. Make sure it’s snug but not too tight to avoid warping.
Ensuring Proper Insulation Continuity
Ensure the new panel aligns with the insulation layer. Add insulation if needed to prevent thermal bridging.
Finishing Touches and Weatherproofing
Apply weatherproof sealant around the new panel’s edges to prevent water. Check that all seams are sealed.
| Step | Description | Tools Needed |
|---|---|---|
| 1 | Remove damaged panel | Pry bar, gloves, safety glasses |
| 2 | Inspect and clean area | Cleaning materials, inspection light |
| 3 | Install new panel | Nails or screws, hammer or drill |
| 4 | Ensure insulation continuity | Insulation material, utility knife |
| 5 | Weatherproofing | Sealant, caulk gun |

Dealing with Moisture and Water Damage in Insulated Siding
Moisture and water damage can harm insulated siding, causing expensive fixes if not fixed quickly. Homeowners must spot and fix these problems fast to keep the siding working well and saving energy.
Identifying Signs of Water Infiltration
Look for discoloration, warping, or rotting on the siding. Check your siding often, looking for moisture damage signs, like after heavy rain or snowmelt.
Drying and Treating Water-Damaged Areas
When you find water damage, dry and treat the area right away. This might mean taking out wet insulation, drying it fully, and using a treatment to stop more damage.
Addressing Mold Growth in Insulation
Mold in insulation is a big problem, affecting siding and health. Removing moldy insulation and treating the spot is key to stopping mold from coming back.
Preventing Future Moisture Problems
To stop moisture issues later, homeowners can do a few things. Improve drainage, seal siding gaps and cracks, and make sure new siding is installed right.
| Prevention Method | Description | Benefits |
|---|---|---|
| Improve Drainage | Ensure proper grading and install gutters | Reduces water accumulation |
| Seal Gaps and Cracks | Use sealants to fill gaps and cracks | Prevents water infiltration |
| Proper Installation | Ensure siding is installed correctly | Maintains siding integrity |
Maintaining Energy Efficiency During Siding Repairs
Keeping your home’s energy use in check is key when fixing siding. Damaged siding can let air in, making your home less insulated. This can raise your energy bills and make your home less comfortable.
How Damage Affects Your Home’s Thermal Performance
Damage to siding can create openings for air to get in. This makes your insulation less effective. It also means your heating and cooling systems work harder, costing more money. Keeping your siding in good shape is important for saving energy.
Techniques to Preserve Insulation Value During Repairs
To keep your insulation working well during repairs, handle it gently. Don’t squish or harm the insulation when taking out or putting in siding panels. Sealing any gaps or cracks around the fixed area is also key to stop air leaks.
| Technique | Benefit |
|---|---|
| Careful Insulation Handling | Preserves Insulation Value |
| Sealing Gaps and Cracks | Prevents Air Leakage |
| Upgrading Insulation | Enhances Energy Efficiency |
Upgrading Insulation When Replacing Panels
When you replace siding panels, you can also improve your insulation. Think about using newer insulation that keeps heat better.
By focusing on energy efficiency during siding repairs, you can make your home more comfortable. You’ll also save on energy costs. It’s a smart move that benefits you in the long run.
Cost Considerations for Insulated Siding Repairs
Understanding the cost of insulated siding repairs is key for homeowners. The cost depends on the damage’s extent, siding type, and whether you DIY or hire a pro.
DIY vs. Professional Cost Comparison
Choosing between DIY and professional repairs is a big decision. DIY is good for small, simple jobs. But, complex repairs need a pro’s skills.
DIY might save on labor, but it’s not always the best choice. If done wrong, it can cost more in the long run.
| Repair Type | DIY Cost | Professional Cost |
|---|---|---|
| Small Crack Repair | $50-$100 | $200-$500 |
| Panel Replacement | $100-$300 | $500-$1,500 |
| Weather Stripping Repair | $20-$50 | $100-$300 |
Budgeting for Different Types of Repairs
Repair costs vary by type. Fixing small issues is cheaper than replacing panels.
It’s important to check the damage well. This helps figure out the repair type and budget.
Insurance Coverage for Siding Damage
Knowing about insurance coverage for siding damage is vital. Some policies cover damage from storms or accidents.
Homeowners should check their policies. This way, they know what’s covered and what’s not.
Long-term Cost Benefits of Timely Repairs
Fixing damage early saves money in the long run. Early repairs stop bigger, more expensive fixes later.
Keeping the siding in good shape also keeps your home energy-efficient. It also keeps your home’s value up.

Conclusion: Protecting Your Investment in Insulated Siding
To keep your insulated siding in top shape, regular maintenance and quick repairs are essential. Knowing how to fix common issues helps your siding work well for longer.
Fixing insulated siding right away is key to keeping your home energy-efficient and damage-free. This article offers expert tips to help you handle repairs with confidence.
Regular checks, quick fixes, and good upkeep are vital for your siding. Taking these steps will make your siding last longer. It will keep your home comfortable, save energy, and look great for many years.