Looking to make your home more energy-efficient and look better? Insulated siding is a smart choice. It’s durable and comes in many styles. With some guidance, you can install it yourself and get great results.
Doing the insulated siding job yourself can save you money and make you proud. This guide will show you the key steps for a successful DIY project.

Key Takeaways
- Understand the benefits of insulated siding for your home.
- Learn the necessary tools and materials for a DIY installation.
- Discover tips for preparing your home’s exterior for siding installation.
- Find out how to avoid common mistakes during the installation process.
- Explore finishing touches to enhance your home’s appearance and durability.
Understanding Insulated Siding and Its Benefits
Homeowners are always looking for ways to make their homes more energy-efficient and look better. Installing insulated siding is a great way to do this. It not only makes your home look good but also saves energy.
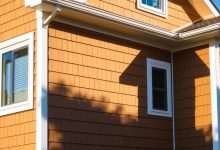
What Is Insulated Siding?
Insulated siding is a siding material that has insulation built into it. It combines traditional siding like vinyl or wood with foam insulation. This makes your home more protected and helps save energy by keeping it cooler in summer and warmer in winter.
Types of Insulated Siding Materials
There are many types of insulated siding materials. Each has its own benefits. Here are a few:
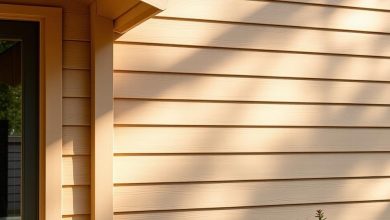
- Vinyl Insulated Siding: Known for its durability and low maintenance.
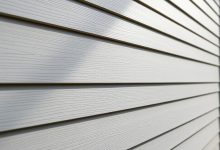
- Fiber Cement Insulated Siding: Offers a more traditional look and is highly resistant to damage.
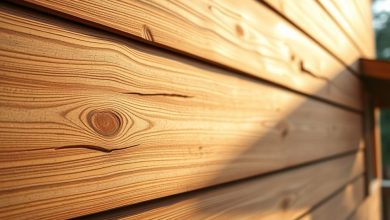
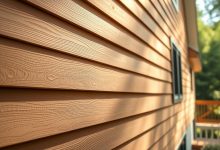
- Engineered Wood Insulated Siding: Provides a natural aesthetic and can be more environmentally friendly.
Choosing the right type depends on what you like, your budget, and your climate.
Energy Efficiency and Cost Savings
Insulated siding is great for saving energy. It helps keep your home cooler in summer and warmer in winter. This means you can save money on your heating and cooling bills.
According to the U.S. Department of Energy, good insulation can cut energy bills by up to 30%.
| Type of Siding | Energy Savings | Cost |
|---|---|---|
| Vinyl Insulated Siding | 20-30% | $8-$12 per sq. ft. |
| Fiber Cement Insulated Siding | 25-35% | $10-$15 per sq. ft. |
| Engineered Wood Insulated Siding | 20-30% | $12-$18 per sq. ft. |
Tools and Materials You’ll Need for Installation
Before starting your DIY insulated siding project, gather the right tools and materials. Having everything ready will make the process easier and faster.
Essential Tools Checklist
You’ll need a tape measure, utility knife, hammer, level, and a circular saw for cutting siding panels. A drill with various bits is necessary for holes. A chalk line keeps your siding straight, and a ladder or scaffolding ensures safe access.
- Tape measure
- Utility knife
- Hammer
- Level
- Circular saw
- Drill with bits
- Chalk line
- Ladder or scaffolding
Materials Shopping List
For DIY insulated siding installation, you’ll need siding panels, starter strips, J-channels, and finishing trim. Also, get the right nails or screws. Have caulk and weatherproofing tape ready to seal gaps.
| Material | Description |
|---|---|
| Insulated Siding Panels | Main siding material |
| Starter Strips | Used at the bottom of walls |
| J-Channels | Installed around windows and doors |
| Finishing Trim | Used for finishing edges |
| Nails or Screws | For securing siding panels |
Safety Equipment Requirements
When working on a siding installation guide project, safety is key. Wear safety glasses, a dust mask, and gloves to protect yourself. A hard hat is also important, for safety near trees or at heights. Make sure your ladder or scaffolding is strong and secure.
- Safety glasses
- Dust mask
- Gloves
- Hard hat
- Sturdy ladder or scaffolding
Preparing Your Home for Insulated Siding
Getting your home ready for insulated siding is key to a smooth installation. Before starting, it’s important to know the steps to prepare your home for this upgrade.
Removing Old Siding Safely
Removing old siding is a critical step that needs care to avoid damage. Start by clearing the area around your home of debris and obstructions. Use a pry bar to gently remove the old siding, working from one corner to the other.
Be cautious not to damage the sheathing or the surrounding landscaping.
Safety first: Wear protective gear, including gloves and safety glasses, to protect yourself from sharp edges and debris.
Wall Inspection and Necessary Repairs
After removing the old siding, inspect the walls for damage or rot. Check for gaps or holes and fill them with sealant. Make any necessary repairs to ensure the walls are sturdy and ready for the new siding.

Installing House Wrap and Moisture Barriers
Installing a house wrap and moisture barrier is key to prevent water infiltration and ensure the siding lasts long. Apply the house wrap as instructed by the manufacturer, overlapping seams by at least 6 inches. This step is vital for a weather-tight seal around your home.
A quote from a renowned builder highlights the importance of this step:
“A properly installed house wrap is the unsung hero of exterior renovations, providing a critical layer of protection against the elements.”
| Preparation Step | Importance | Tips |
|---|---|---|
| Removing Old Siding | High | Use a pry bar gently, wear protective gear |
| Wall Inspection | High | Check for damage, fill gaps, make repairs |
| Installing House Wrap | Critical | Follow manufacturer’s instructions, overlap seams |
Measuring and Planning Your Siding Layout
Measuring and planning your siding layout is key for a smooth installation. It helps figure out how much material you need and spots issues early on.
Taking Accurate Measurements
Begin by measuring each wall’s width and height. Use a tape measure for precise numbers. Don’t forget to include areas around windows, doors, and other features. Making a diagram or sketch of your home’s exterior is a good idea.
For complex homes, a laser measuring tool can be very helpful. Double-check your measurements to avoid mistakes that could cost you a lot of money or waste materials.
Calculating Materials and Minimizing Waste
After getting your measurements, calculate the total square footage of siding you’ll need. Add 10% to 15% to your total for cuts, waste, and irregularities. Use the manufacturer’s guidelines to figure out how many panels or planks you’ll need.
To cut down on waste, think about your siding layout. For example, use cut pieces in less visible areas, like under windows or at the top of walls, if you’re using plank-style siding.
Creating a Detailed Installation Plan
With your measurements and material calculations ready, make a detailed plan for installation. Choose a starting point, like the bottom or a corner, and plan the order of installation.
Think about where windows, doors, and other features are. Plan how you’ll cut and fit the siding around them. A good plan makes the installation smoother and helps you get a professional look.
How to Install Insulated Siding: Step-by-Step Process
Installing insulated siding needs careful planning and execution. But the results are worth it. With simple tools and patience, you can make your home’s exterior beautiful and energy-efficient.
Experts say, “a successful installation is all about the details.” This means preparing tools and finishing touches carefully.
Installing Starter Strips and J-Channels
The first step is installing starter strips and J-channels. Starter strips help the first siding course stay level. J-channels fit around windows and doors, making a channel for siding.
To start, snap a chalk line around your home for the starter strip’s top. Then, nail it in place, ensuring it’s level and secure.
Cutting and Fitting Insulated Panels Properly
Cutting and fitting panels need precision to avoid waste and ensure a good fit. Use a circular saw or utility knife for cutting. Always wear safety glasses and a dust mask.
Begin fitting panels from the bottom up. Make sure each panel is aligned and securely fastened.
Nailing Techniques and Securing Panels
Nailing techniques are key to securing panels. Use the right nailing pattern and type to avoid damage and ensure a tight fit.
Remember, “nails should be in the center of the slot, and the head should be flush with the siding.” This keeps the siding secure without being too tight.
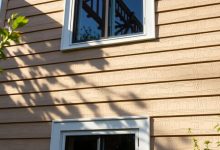
Working Around Windows, Doors, and Obstacles
Working around windows, doors, and obstacles is challenging. Use J-channels for a seamless fit.
Take your time cutting and fitting around these areas. Precise cuts are vital for a professional finish.
Handling Corners and Special Areas
Learning to install insulated siding means mastering corners and special features. These spots need extra care for a smooth, professional look.
Inside and Outside Corner Installation
Inside and outside corners are key. They need precise cuts and fitting. Use a miter saw or circular saw for accurate cuts. Then, fit the siding together for a tight seal.
Tips for outside corners: Use a corner piece or a custom-cut piece for a weather-tight seal. Inside corners can be fitted with a butt fit or a custom piece.

Siding Around Utilities, Fixtures, and Vents
When siding around utilities, fixtures, and vents, plan carefully. Mark the area first. Then, cut the siding with a jigsaw or utility knife to fit it.
Key tricks: Use a template for a precise cut. Apply sealant around the edges to keep water out. This makes the finish clean and professional.
Addressing Unusual Architectural Features
Curved walls or asymmetrical designs need creative solutions. Mix cutting and fitting with custom pieces for a perfect fit.
Some tips: Take precise measurements. Use flexible siding materials if you can. Consider custom siding pieces for unique features.
Finishing Touches and Weather Sealing
As you near the end of your insulated siding installation, focus on the finishing touches. These steps are key to your siding’s longevity and weather resistance. They protect your home from the elements.
Installing Finishing Trim and Accessories
Installing finishing trim and accessories is a vital step. Finishing trim includes J-channels, starter strips, and corner posts. They make your home look professional and protect it from water.
When you install finishing trim, make sure it’s aligned and fastened well. Use manufacturer’s guidelines for spacing and nailing. This keeps the trim and siding strong.
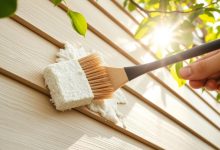
Proper Sealing and Caulking Techniques
Sealing and caulking are key for weather resistance. Caulking around windows, doors, and joints keeps water out. This prevents damage to the siding and structure.
To get a strong seal, choose a high-quality caulk that fits your siding. Apply caulk in a continuous bead. Make sure it’s not too thin. Tool the caulk for a smooth finish.
By paying attention to these finishing touches and sealing techniques, you’ll improve your insulated siding’s performance and look. This ensures your siding works well for your home’s long-term needs.
Troubleshooting Common Installation Problems
Even with careful planning, installation issues can arise, but don’t worry, we’ve got you covered. Insulated siding installation is generally straightforward, but like any home improvement project, it can have its challenges. In this section, we’ll address some common problems you might encounter and provide practical solutions to get your project back on track.
Dealing with Uneven Walls and Surfaces
Uneven walls and surfaces can be a challenge when installing insulated siding. To address this, use shims or furring strips to level out the surface before installing the siding. This ensures a smooth, even finish and prevents water from accumulating behind the siding.
Fixing Buckling, Warping, and Loose Panels
Buckling or warping of insulated siding panels can occur due to improper nailing or extreme temperature changes. To fix this, check that the panels are properly secured with the recommended nailing pattern. If a panel is loose, re-nail it, ensuring not to over-tighten, which can cause further damage. As “proper installation is key to avoiding these issues.”
Addressing Water Infiltration Issues
Water infiltration can be a serious issue if not addressed promptly. Check that all joints and seams are properly sealed with a high-quality caulk. Ensure that the house wrap is correctly installed and that there are no gaps around windows, doors, or vents. As a general rule,
“Prevention is better than cure.”
Regular inspections can help identify and fix issues before they become major problems.
Conclusion
Installing insulated siding can be easy with the right tools and planning. This guide has shown you the key steps, from getting ready to finishing up.
By using this installation guide, you’ve learned how to measure and plan your siding. You also know how to handle corners and special areas. And, you can solve common problems. The secret to success is paying attention to details and being patient.
Starting your DIY insulated siding project means careful planning and execution. This guide has given you the tips and tricks you need. You’ll improve your home’s energy use and look. Take your time and refer back to this guide as needed for a great result.